
Sale!

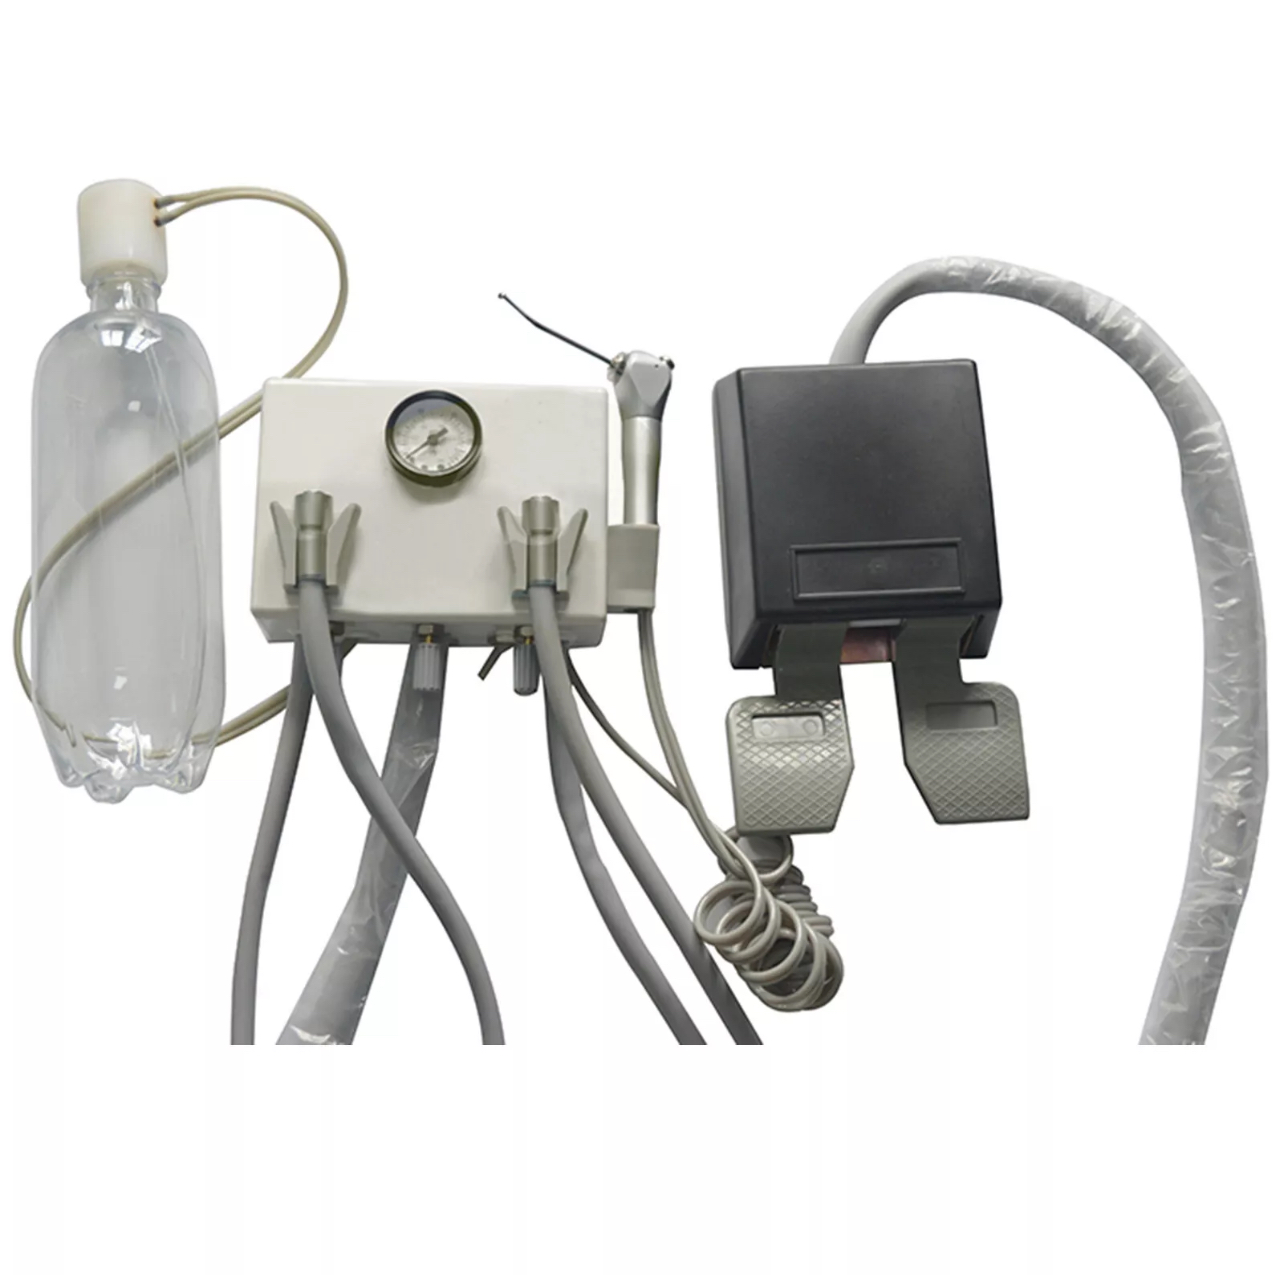
Wall Mounted Dental Unit

Original price was: $185.97.Current price is: $158.07.

This unit is covered by a 3-month warranty. Proper handling and storage away from children are essential for warranty eligibility.

Portable Dental Unit
4 holes

This unit is covered by a 6-months warranty. Proper handling and storage away from children are essential for warranty eligibility.

Portable Dental Unit – Installation and Operating Instructions

Contents of the Box

The package includes the following items:

* Portable Dental Unit

* Transparent air supply tube

* Connection tubing for the High-Speed Handpiece

* Connection tubing for the Slow-Speed Handpiece

* Triplex syringe (pre-connected to the dental unit)

* Foot pedal pre-connected to the dental unit

* Water bottle

Installation Instructions

1. Positioning the Dental Unit

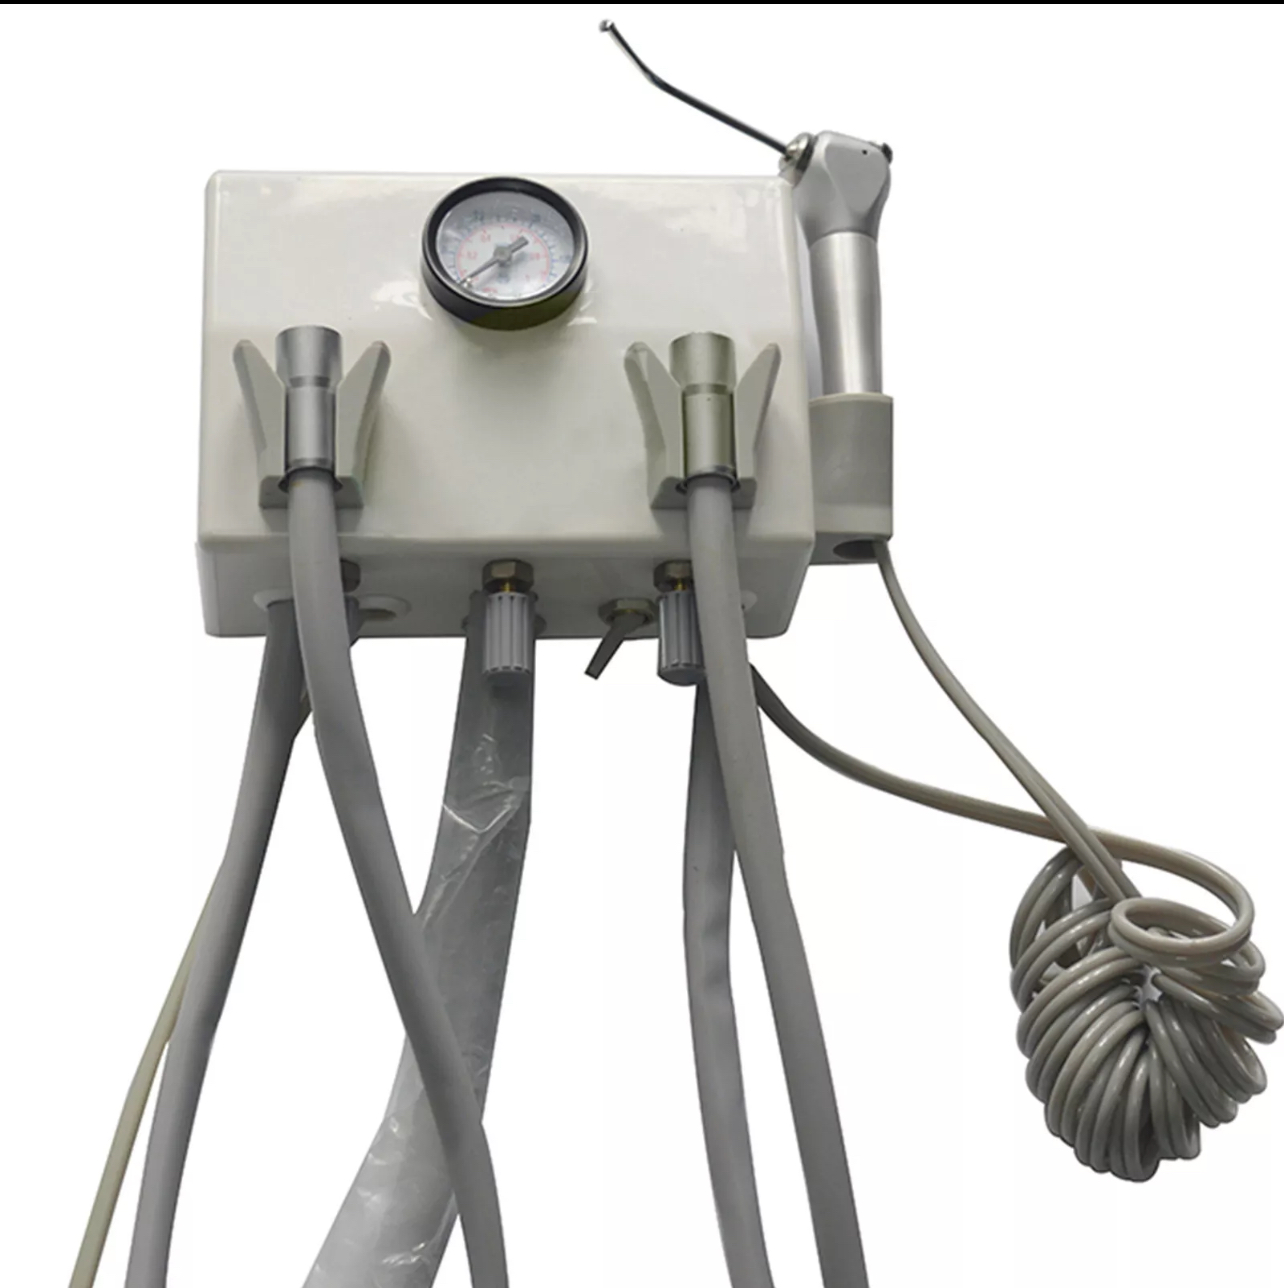
Place the dental unit in a stable vertical position. Ensure there is sufficient distance and space to place the foot pedal comfortably on the floor for easy operation.

2. Connecting the Handpieces

* The first tube, located on the right side of the dental unit, is for connection to the High-Speed Handpiece.

* The second tube, located in the middle, is for connection to the Slow-Speed Handpiece.

* The third tube, located on the left side, is connected to the Triplex Syringe.

3. Filling the Water Bottle

Fill the water bottle to approximately three-quarters (¾) of its capacity only. Do not fill it completely, as sufficient air space must remain inside the bottle to generate the appropriate internal pressure required to deliver water properly.

4. Connecting the Transparent Tube

Connect the transparent tube to the dental unit as follows:

1. Locate the fixing screw at the bottom of the dental unit and loosen it.

2. Insert the screw onto the transparent tube.

3. Connect the transparent tube to the metal connection port.

4. Tighten the screw securely to ensure there is no air leakage.

The other end of the transparent tube requires a suitable connector/adaptor (to be purchased separately) in order to connect it to the air compressor.

Compressor Pressure Adjustment

After connecting the dental unit to the compressor, check the pressure gauge on the dental unit.

If the gauge reads below 30 psi, the airflow from the compressor is insufficient.

To correct this:

1. Open the airflow control valve on the compressor gradually.

2. Operate the handpiece while observing the pressure gauge.

3. Adjust the compressor output until the pressure gauge on the dental unit reads approximately 90 psi.

Important: Do not adjust or tamper with the pressure regulator on the dental unit itself. The unit has already been calibrated and is ready for use. All pressure adjustments should be made only from the compressor side.

Final Checks Before Use

After completing all connections between the dental unit and the compressor, ensure that the following switches on the dental unit are turned ON:

* Air Switch – ON

* Water Switch – ON

* Water Bottle Switch – ON

Once these switches are turned on and the pressure is adjusted correctly, the dental unit is ready for operation.

May cause allergic reactions in sensitive individuals. Users are responsible for assessing suitability before use.For educational simulation use only. Not for clinical or patient use.

In stock (can be backordered)

Purchase & earn 158 points!

Description

Portable Dental Unit
4 holes

This unit is covered by a 6-months warranty. Proper handling and storage away from children are essential for warranty eligibility.

Portable Dental Unit – Installation and Operating Instructions

Contents of the Box

The package includes the following items:

* Portable Dental Unit

* Transparent air supply tube

* Connection tubing for the High-Speed Handpiece

* Connection tubing for the Slow-Speed Handpiece

* Triplex syringe (pre-connected to the dental unit)

* Foot pedal pre-connected to the dental unit

* Water bottle

Installation Instructions

1. Positioning the Dental Unit

Place the dental unit in a stable vertical position. Ensure there is sufficient distance and space to place the foot pedal comfortably on the floor for easy operation.

2. Connecting the Handpieces

* The first tube, located on the right side of the dental unit, is for connection to the High-Speed Handpiece.

* The second tube, located in the middle, is for connection to the Slow-Speed Handpiece.

* The third tube, located on the left side, is connected to the Triplex Syringe.

3. Filling the Water Bottle

Fill the water bottle to approximately three-quarters (¾) of its capacity only. Do not fill it completely, as sufficient air space must remain inside the bottle to generate the appropriate internal pressure required to deliver water properly.

4. Connecting the Transparent Tube

Connect the transparent tube to the dental unit as follows:

1. Locate the fixing screw at the bottom of the dental unit and loosen it.

2. Insert the screw onto the transparent tube.

3. Connect the transparent tube to the metal connection port.

4. Tighten the screw securely to ensure there is no air leakage.

The other end of the transparent tube requires a suitable connector/adaptor (to be purchased separately) in order to connect it to the air compressor.

Compressor Pressure Adjustment

After connecting the dental unit to the compressor, check the pressure gauge on the dental unit.

If the gauge reads below 30 psi, the airflow from the compressor is insufficient.

To correct this:

1. Open the airflow control valve on the compressor gradually.

2. Operate the handpiece while observing the pressure gauge.

3. Adjust the compressor output until the pressure gauge on the dental unit reads approximately 90 psi.

Important: Do not adjust or tamper with the pressure regulator on the dental unit itself. The unit has already been calibrated and is ready for use. All pressure adjustments should be made only from the compressor side.

Final Checks Before Use

After completing all connections between the dental unit and the compressor, ensure that the following switches on the dental unit are turned ON:

* Air Switch – ON

* Water Switch – ON

* Water Bottle Switch – ON

Once these switches are turned on and the pressure is adjusted correctly, the dental unit is ready for operation.

May cause allergic reactions in sensitive individuals. Users are responsible for assessing suitability before use.For educational simulation use only. Not for clinical or patient use.

Additional information

Weight2.706 kg
Dimensions250 × 210 × 220 mm
error: Content is protected !!
WhatsApp Facebook Telegram